 Save to Pinterest
AI concept. These products recreate a similar look.
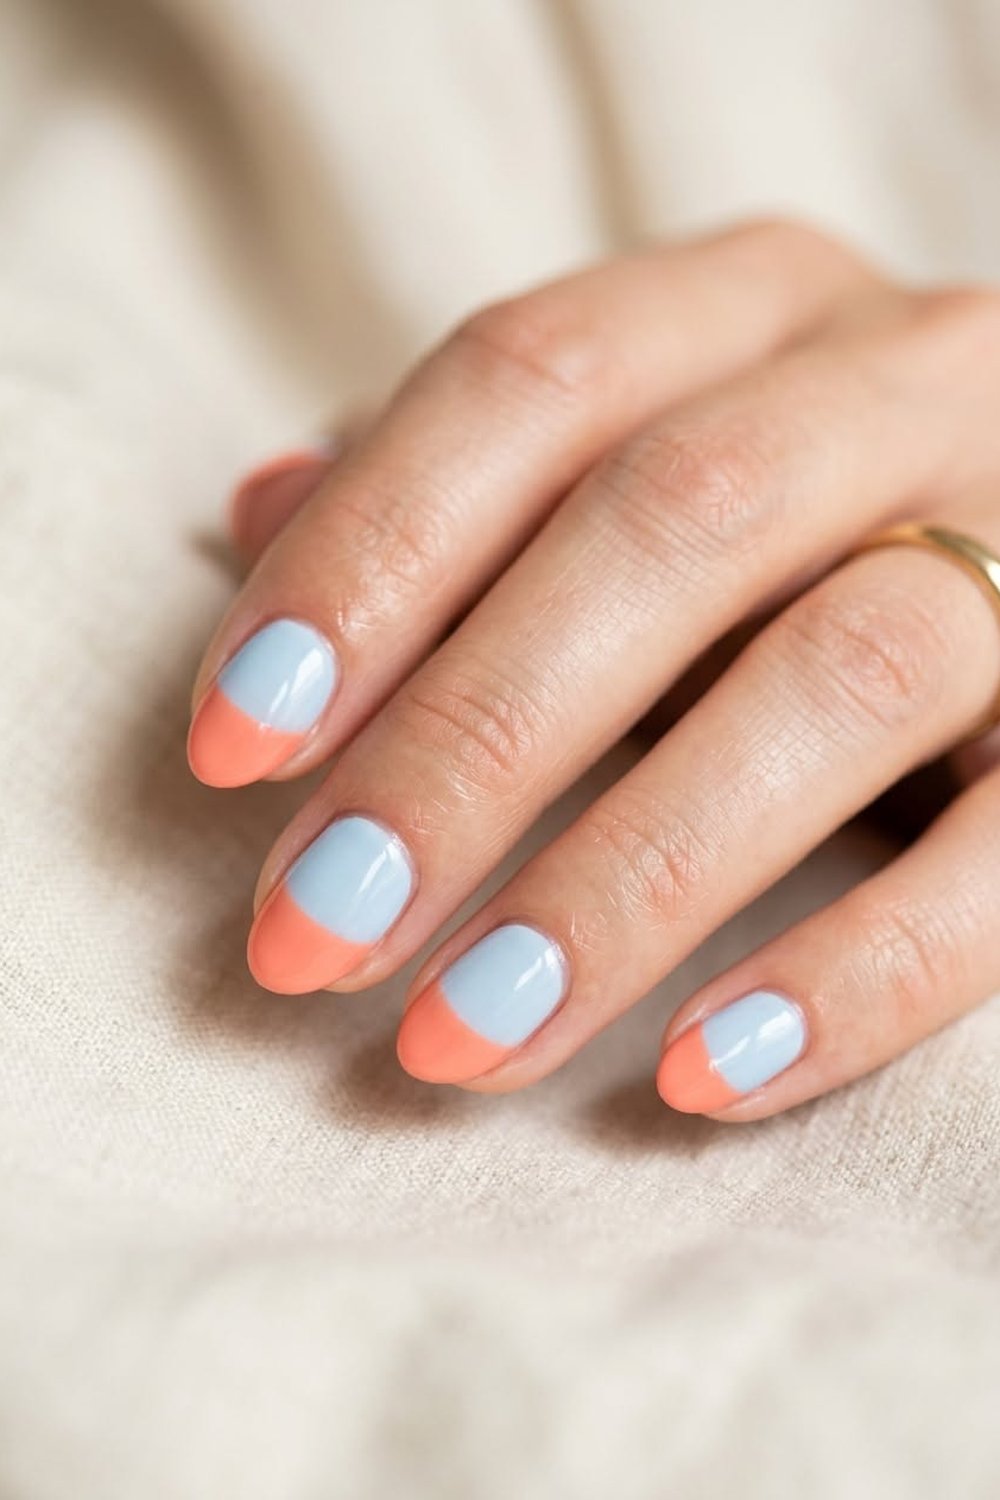
Baby blue nails with coral-orange half-moon tips. Photo: AI-generated editorial illustration of the look, not a photo of the products listed.
How to Get Soft Colorblock Half-Moon Nails at Home
Two soft brights that meet at a clean curve. Baby blue covers most of the nail and a coral-orange tip finishes it, so it looks playful but still neat.
The colour story
Powder baby blue and warm coral sit opposite each other on the colour wheel, so they pop without being loud.
- Baby blue#AFC0D2
- Coral orange#E8703A
- Cream knit#EFE6DC
- Skin warm#D9A58E
What you need
Recreate the look
-
Essential
Beetles No-Wipe Top Coat & Base Coat Set
2 × 15 ml · glossy, no-wipe finish
The base coat helps the gel grip. The no-wipe top coat gives the glossy finish and seals everything in.
Gel polish can cause allergic reactions. Keep it off skin and cuticles, and patch-test first.
View on Amazon (paid link) -
The main shade
Beetles Baby Blue Gel Polish, 15 ml
Shade: D - Creme Blue | Baby Blue
Covers most of the nail. Two thin coats.
Gel polish can cause allergic reactions. Keep it off skin and cuticles, and patch-test first.
View on Amazon (paid link) -
The tip
Beetles Orange Gel Polish, Carly Coral Orange, 15 ml
Shade: M - Creme Orange | Carly Coral Orange
The curved tip. One or two coats with a fine brush.
Gel polish can cause allergic reactions. Keep it off skin and cuticles, and patch-test first.
View on Amazon (paid link) -
The brush
Beetles Nail Art Liner Brushes, 5 pcs
5 brushes: 5, 7, 9, 11, 20 mm
A thin brush (7–9 mm) draws the curved line between the colours.
Gel polish can cause allergic reactions. Keep it off skin and cuticles, and patch-test first.
View on Amazon (paid link) -
Essential
SUNUV SUNONE UV/LED Nail Lamp
Colour: White · 30/60/99 s timers, auto sensor
The lamp for this look. Cure each thin coat fully, with the thumb flat.
View on Amazon (paid link)
Step by step
Prep
Push back cuticles, shape the nails, and lightly buff the shine off the nail plate, including the free edge. Brush off the dust, wipe with rubbing alcohol or a nail dehydrator, and let the nail dry completely.
Base coat
Brush on a thin layer and cap the free edge. Keep it off the skin and cuticles.
Cure 60–90 sBaby blue, 2 coats
Apply two thin coats of baby blue over the whole nail and cure after each one.
Cure 60 s per coatThe coral tip
With the liner brush, draw a curve across the tip, deeper in the middle and lower at the sides, following the shape of the free edge. Fill the tip with coral and cap the edge. Do a second coat if it looks streaky.
Cure 60 s per coatGlossy top coat
Seal every nail with the no-wipe top coat and cap the edges. Do not wipe this coat after curing. The instructions on the bottle win.
Cure 90–120 s
Pro tips
- Match the curve. Draw the line parallel to your free edge so every nail looks the same.
- Fix before curing. A wobbly line is easy to clean with a brush dipped in alcohol before it goes in the lamp.
- Thumbs flat in the lamp. A tilted thumb sits in the shadow of the lamp and can stay under-cured. Cure thumbs flat, or cure them on their own.
- Patch-test first. Gel can cause allergies. Keep it off your skin and cuticles, and stop if you get itching or redness.
FAQ
Can I swap the colours?
Yes. Any light crème with a brighter tip works. Keep the main colour soft so the tip stands out.
How long does it last, and how do I remove it?
With good prep and thin, fully cured layers, expect about 2–3 weeks. To remove, lightly buff the shine off the top coat, soak a cotton pad in acetone, and wrap each nail in foil for at least 15 minutes. Then gently push the gel off. If it still holds, soak for another 5 minutes. Never peel it.
Want to try this later? Save it.
Save to Pinterest